Poker Table
Read Time: ~7 minutes
Intro
My dad is a long-time member of a local poker group with several other friends. They meet once per month and take turns hosting where each member hosts twice per year. Despite only hosting two evenings every 365 days, the standard card table, dining table, or the eight person custom poker table he previously purchased was never quite up to par. Numerous times my dad sat down to figure out how to deconstruct his eight person table and attempt to design it for six. Playing with two blatantly open seating placements and bumping elbows with other men for several hours is never ideal. This is where I stepped in (with the help of my sister.) I decided it would be a great idea to design, build, and surprise my dad with the poker table he often sought after. My only point of contention was my mother. She agreed on the table concept but had one stipulation. “If you build him a new table <dramatic pause> it better have collapsible legs to fold up and out of my way when not in use!” You got it mom!
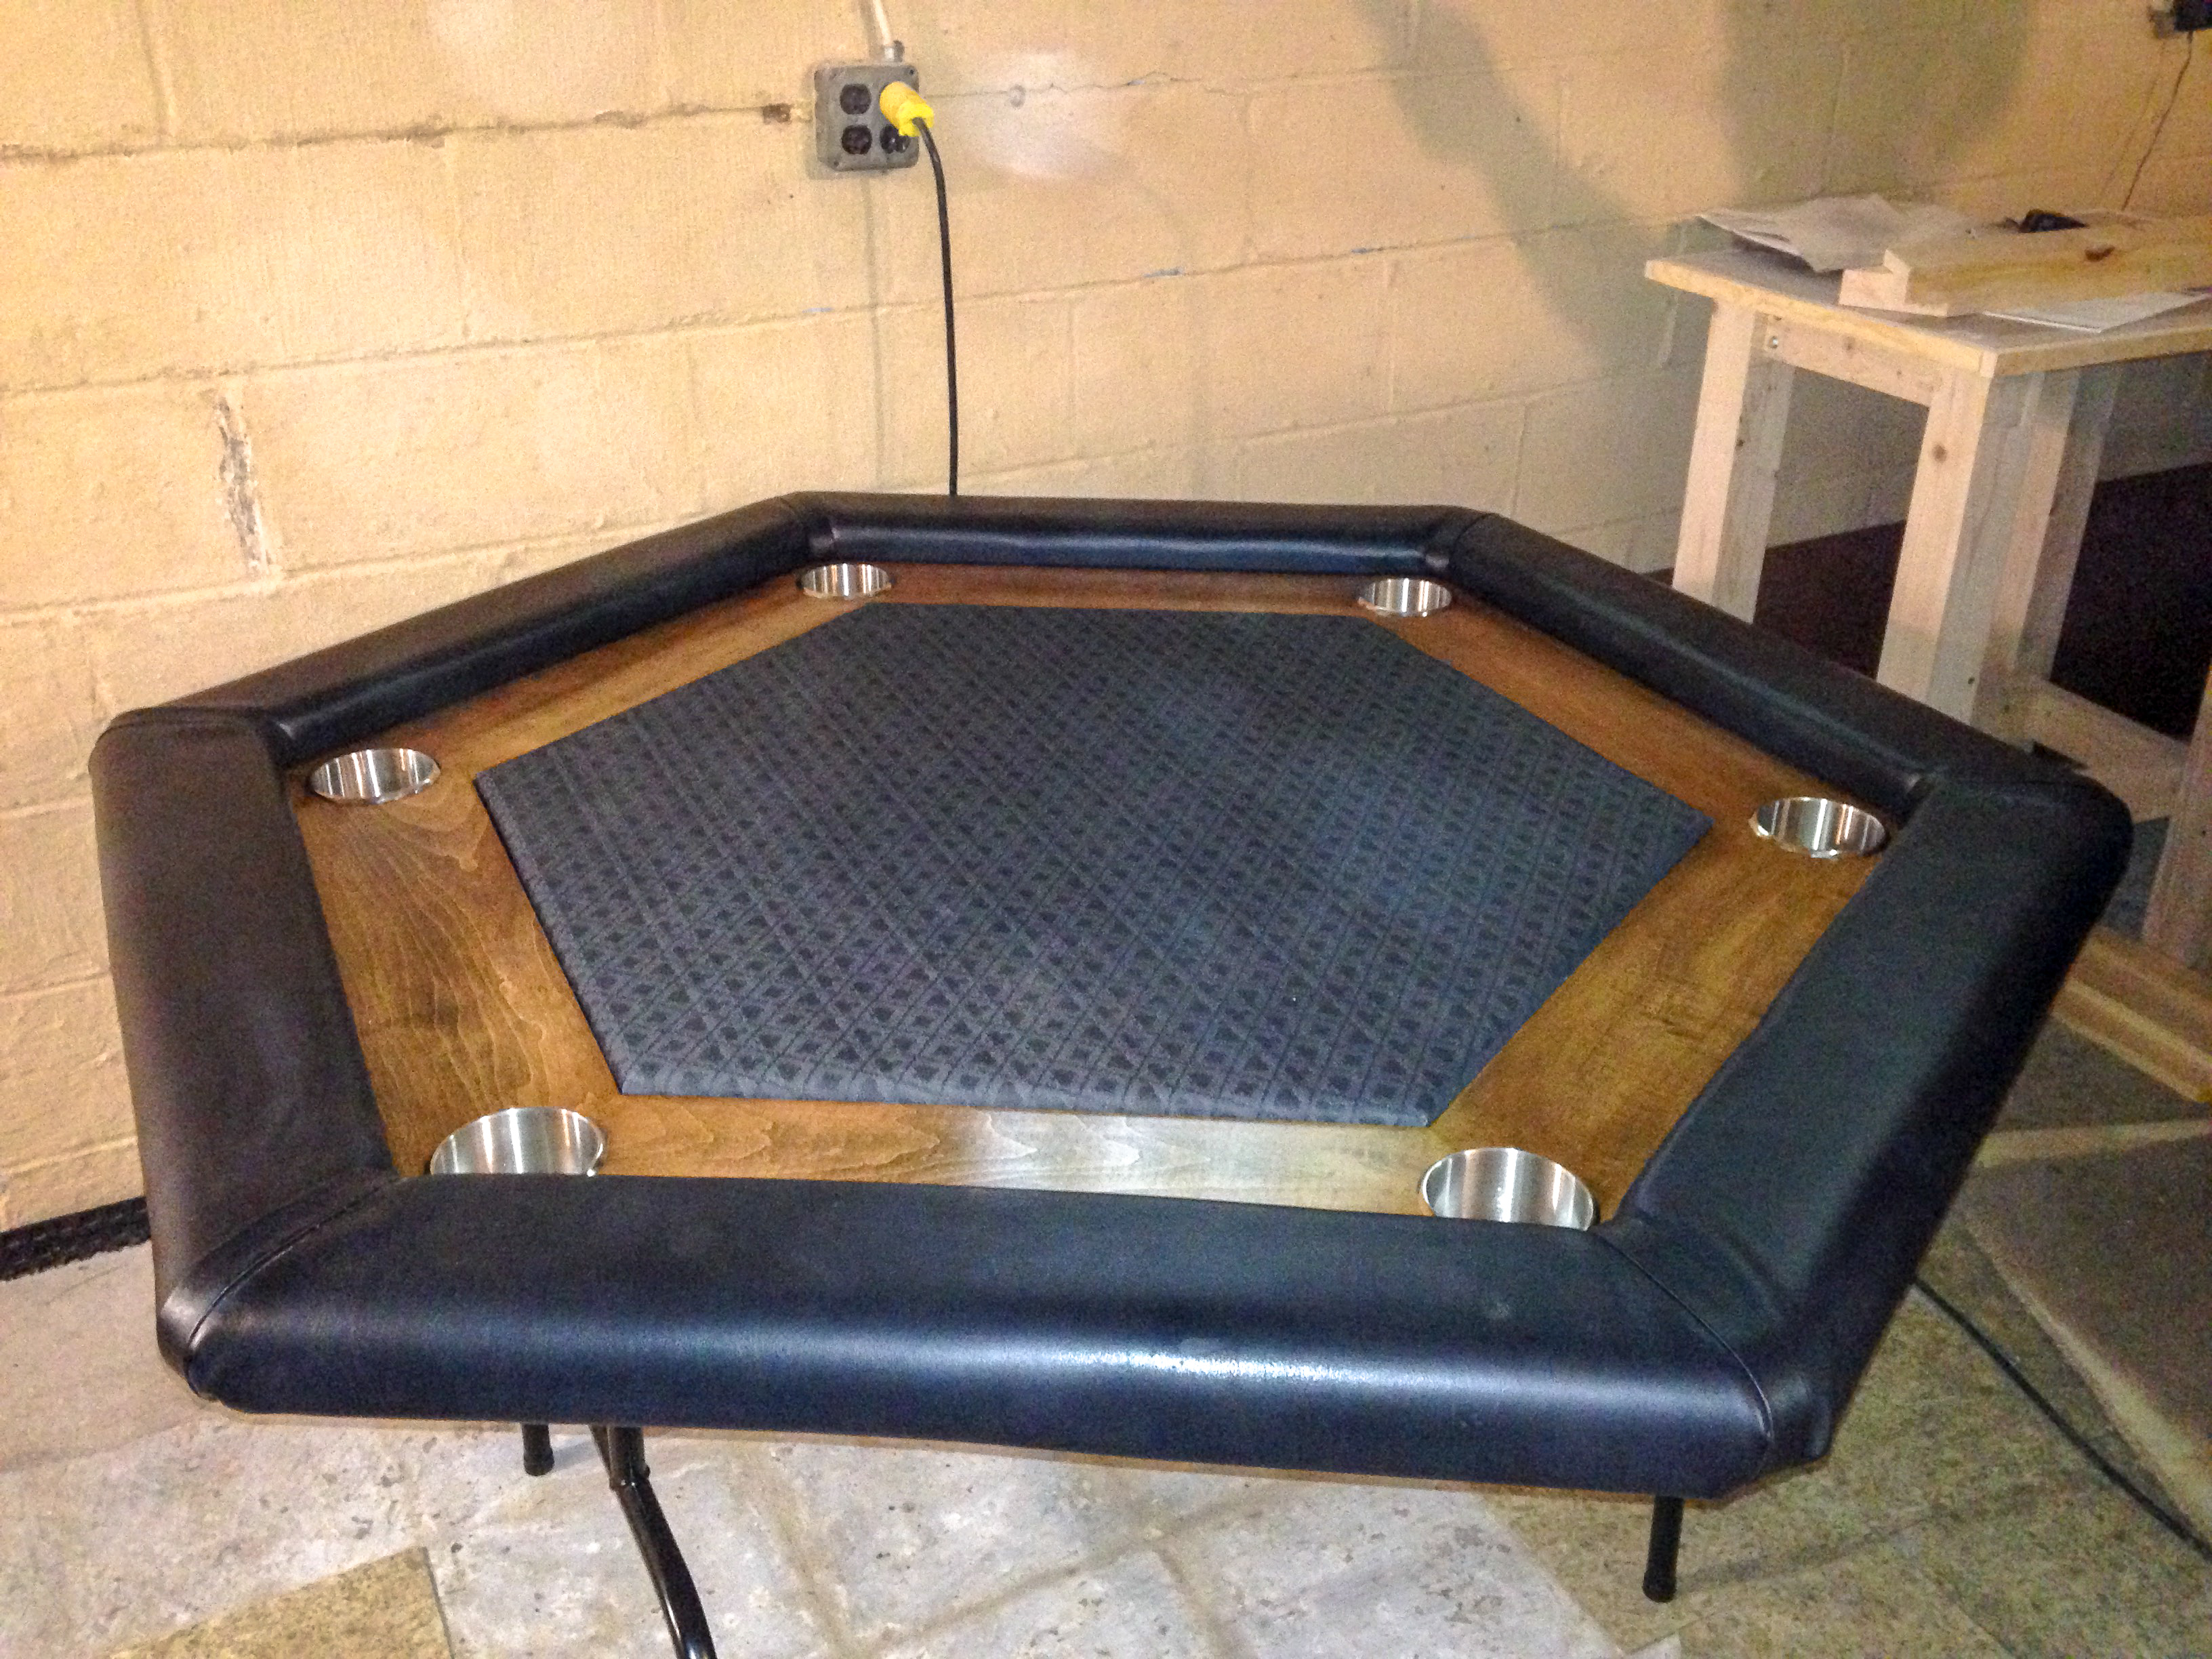
Photo 1
How I did it
The design process started out fairly simple. Six people, six sides. Everyone is familiar with hexagons so there were no surprises there. Just take a step back to good ‘ole geometry class, divide 360 by the number of angles to get the proper cuts, and blah blah blah...math! The more challenging part was determining how wide the table should span. If you research online, there are next to no prior tables built for anything less than eight players. Why eight?! I’m not exactly sure. There may be a solidified reason in some ancient text out there somewhere. I mean, the Native Americans had to play poker, right? How else did they lose their land to the Europeans...? Too soon? Anywho, I ended up having to make a complete guess on the size of the table. So I did the most scientific thing I could think of. Sit down at my dining room table with a metal yardstick wedged into my armpit and measure how far I could reach to collect my chips after a winning hand. After I obtained this precise measurement of roughly an arm’s length <comedic pause> I doubled it, rounded accordingly to a measurement I didn’t mind working with, and ran with it. This happened to be quite effective in the end. Luck? Nope, science!
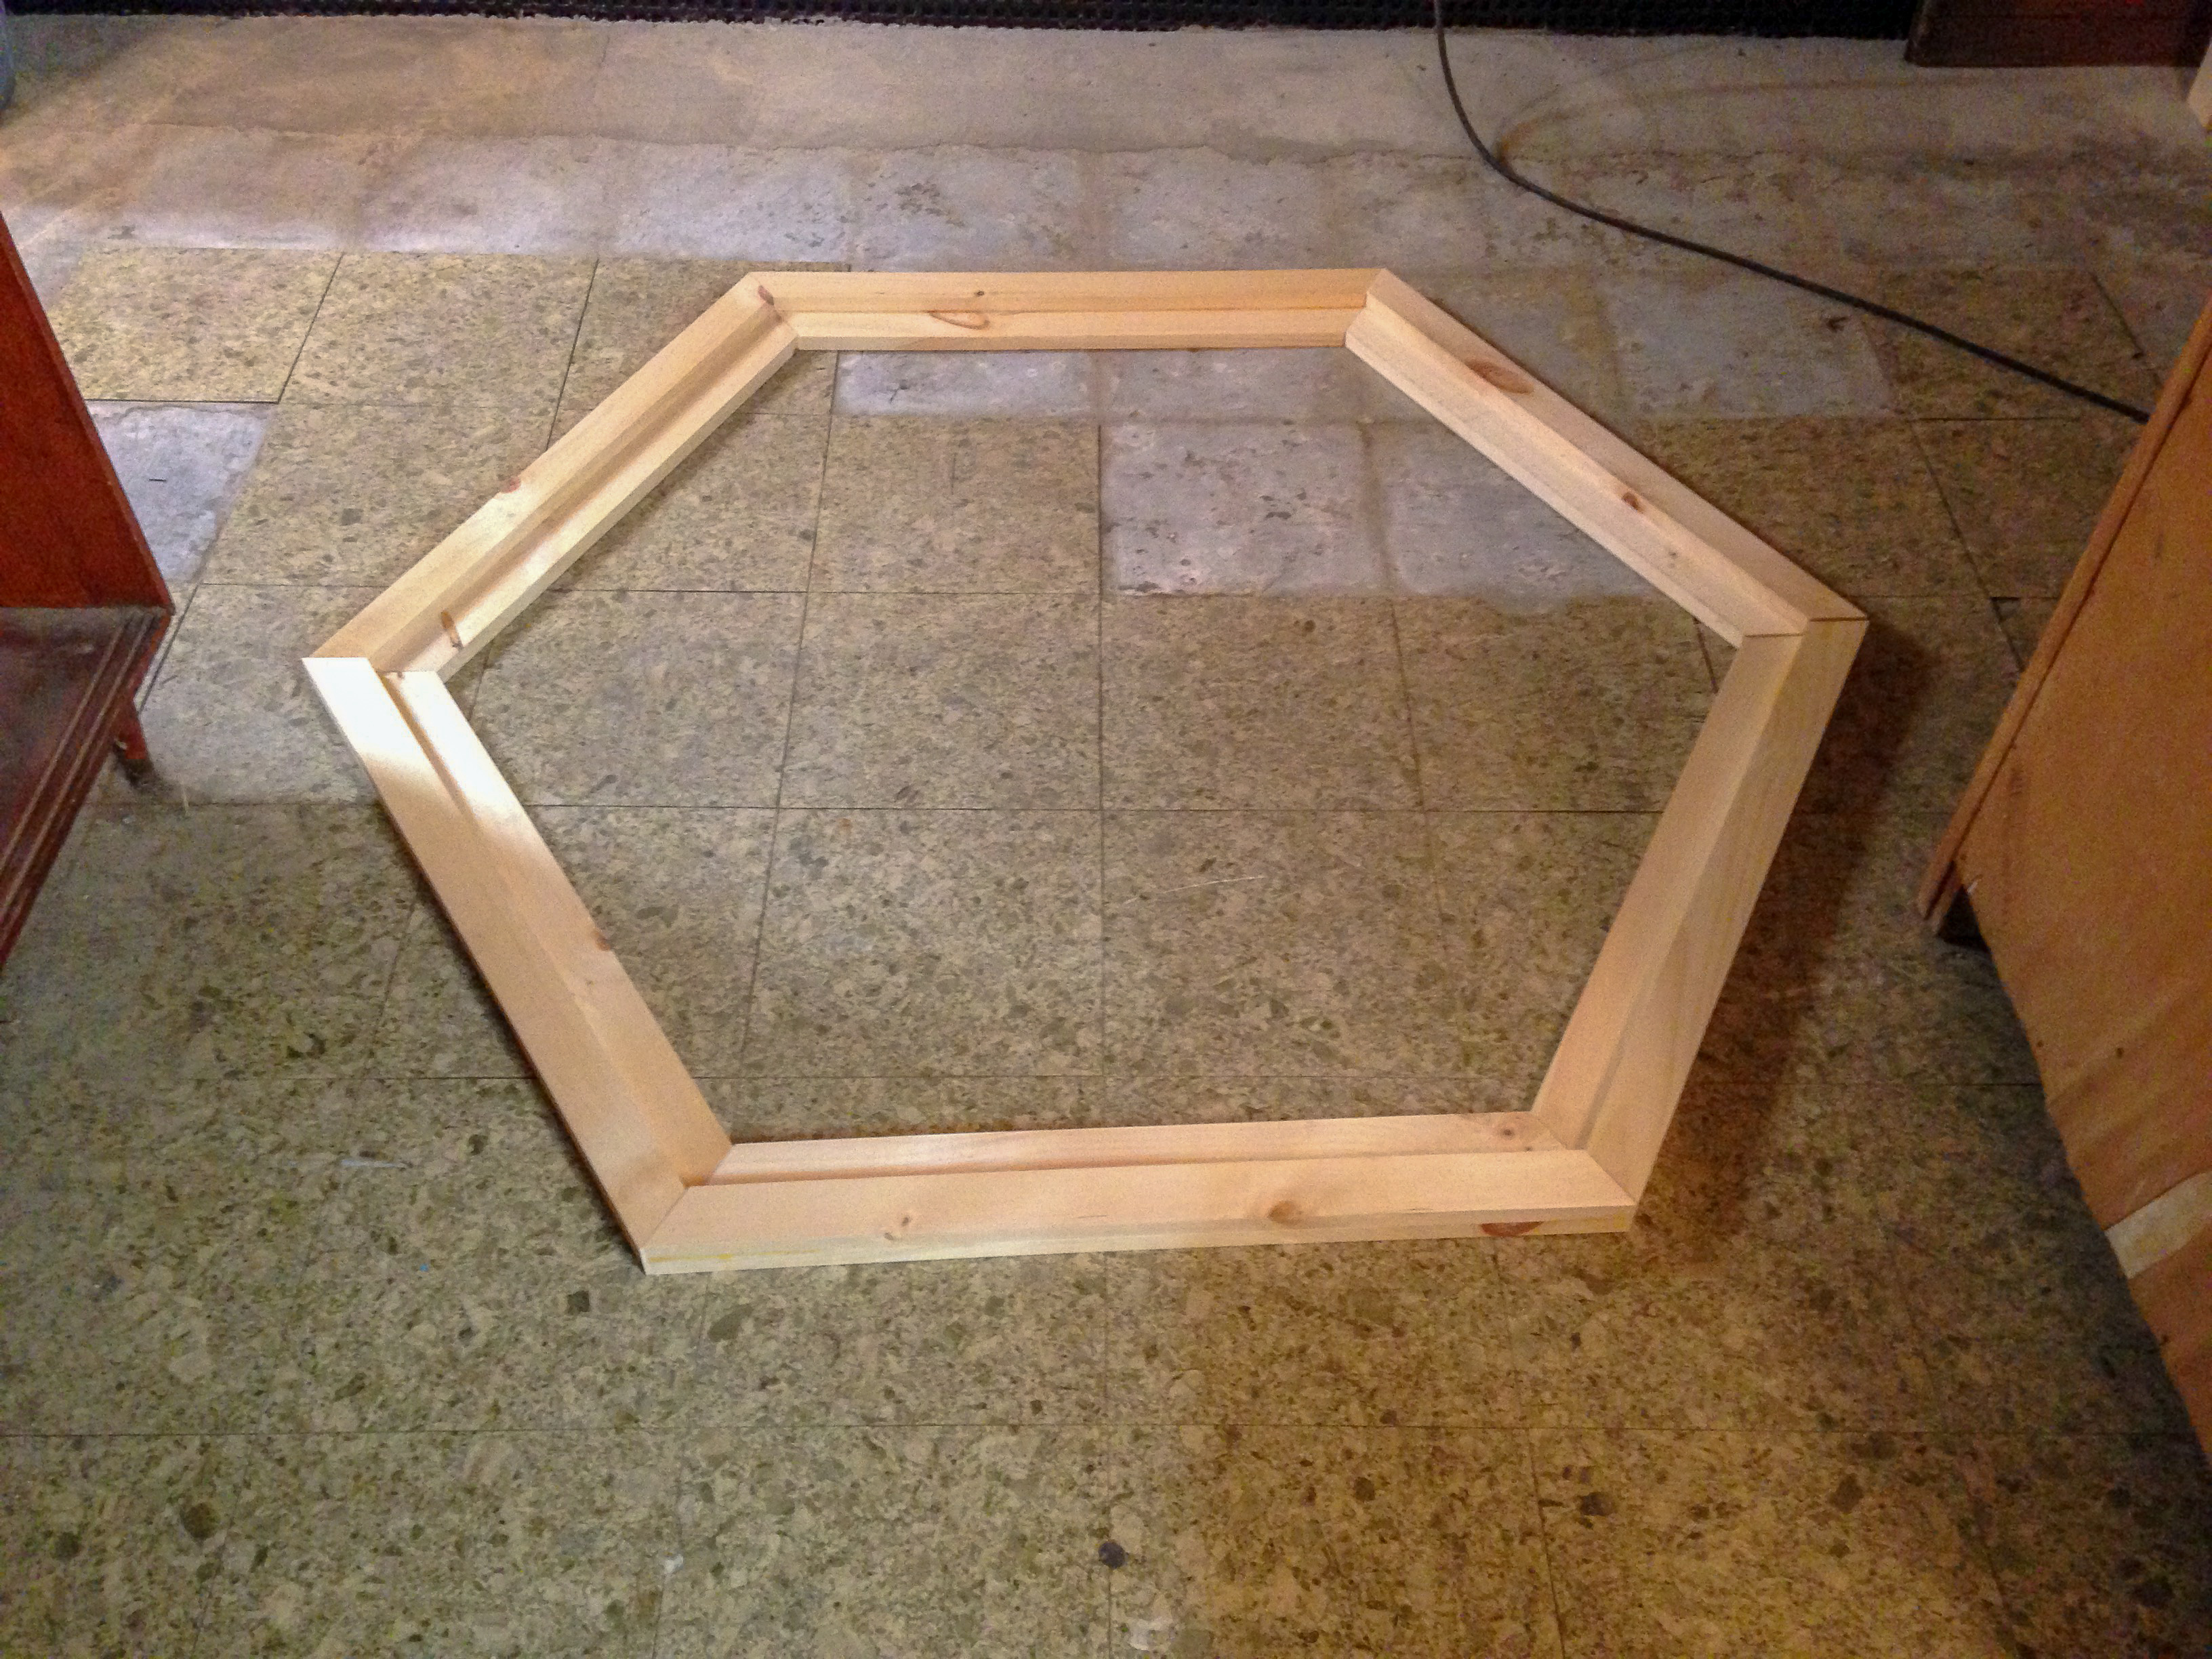
Photo 2
With the overall shape and dimensions complete, what next? How am I going to differentiate between the many aspects of this build? Where will the chip rails start and stop? How will I build the center play area? Should I build a fancy foam armrest for playing comfort? Most importantly, how and where do I find the proper legs to hold this beast of a table and comply with my mom’s one and only rule?
Turns out with a simple Google search, I stumbled across a casino supply website. I will include a link to them below (#notsponsored) for anyone other interested parties. This supply store offered two different heights of collapsable legs. I went with the shorter of the two. While shopping, I came across everything else I needed for the armrests and center playing area. Problems solved!
Now that I had acquired the necessary materials, I could finish up my design. I did so using the free version of Google Sketchup (#againnotsponsored.) Via Google image search, I found a cross section image of poker table that I used for my inspiration and design (see Photo 3.) Next, with everything sketched out, it was time to tackle the building.
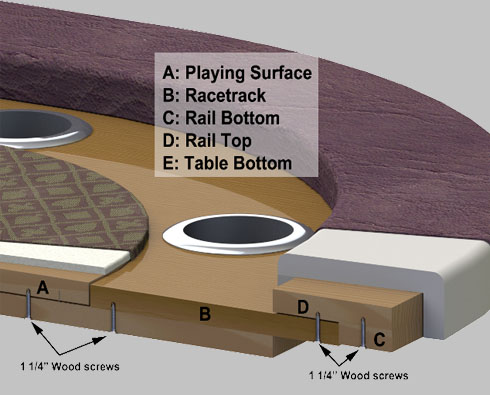
Photo 3
Back in the shop, the first step was to cut and assemble the rails and inner ring for chip storage. I’ll admit, I failed to consider a couple of key things at this point. My original plan was to make six identical rails, then use glue and pocket holes/screws to attach them to each other. I quickly found out how terrible of a mistake this was. With the angles of the rails and overall lack of surface area for bonding strength, this plan would not succeed. I scrapped those rails and instead rebuilt them longer to incorporate a half-lap joint (see Photo 4.) This method supplied much more surface area for the glue to bond and worked out much better. Pro tip: do not get too far ahead of yourself. With the chip rails, I made the same mistake because I was using a custom table saw jig and I cut all of the angled boards in one session. I decided (or was forced) to make it work since the chip rail lumber was much more expensive and I couldn’t afford to replace it at the time.
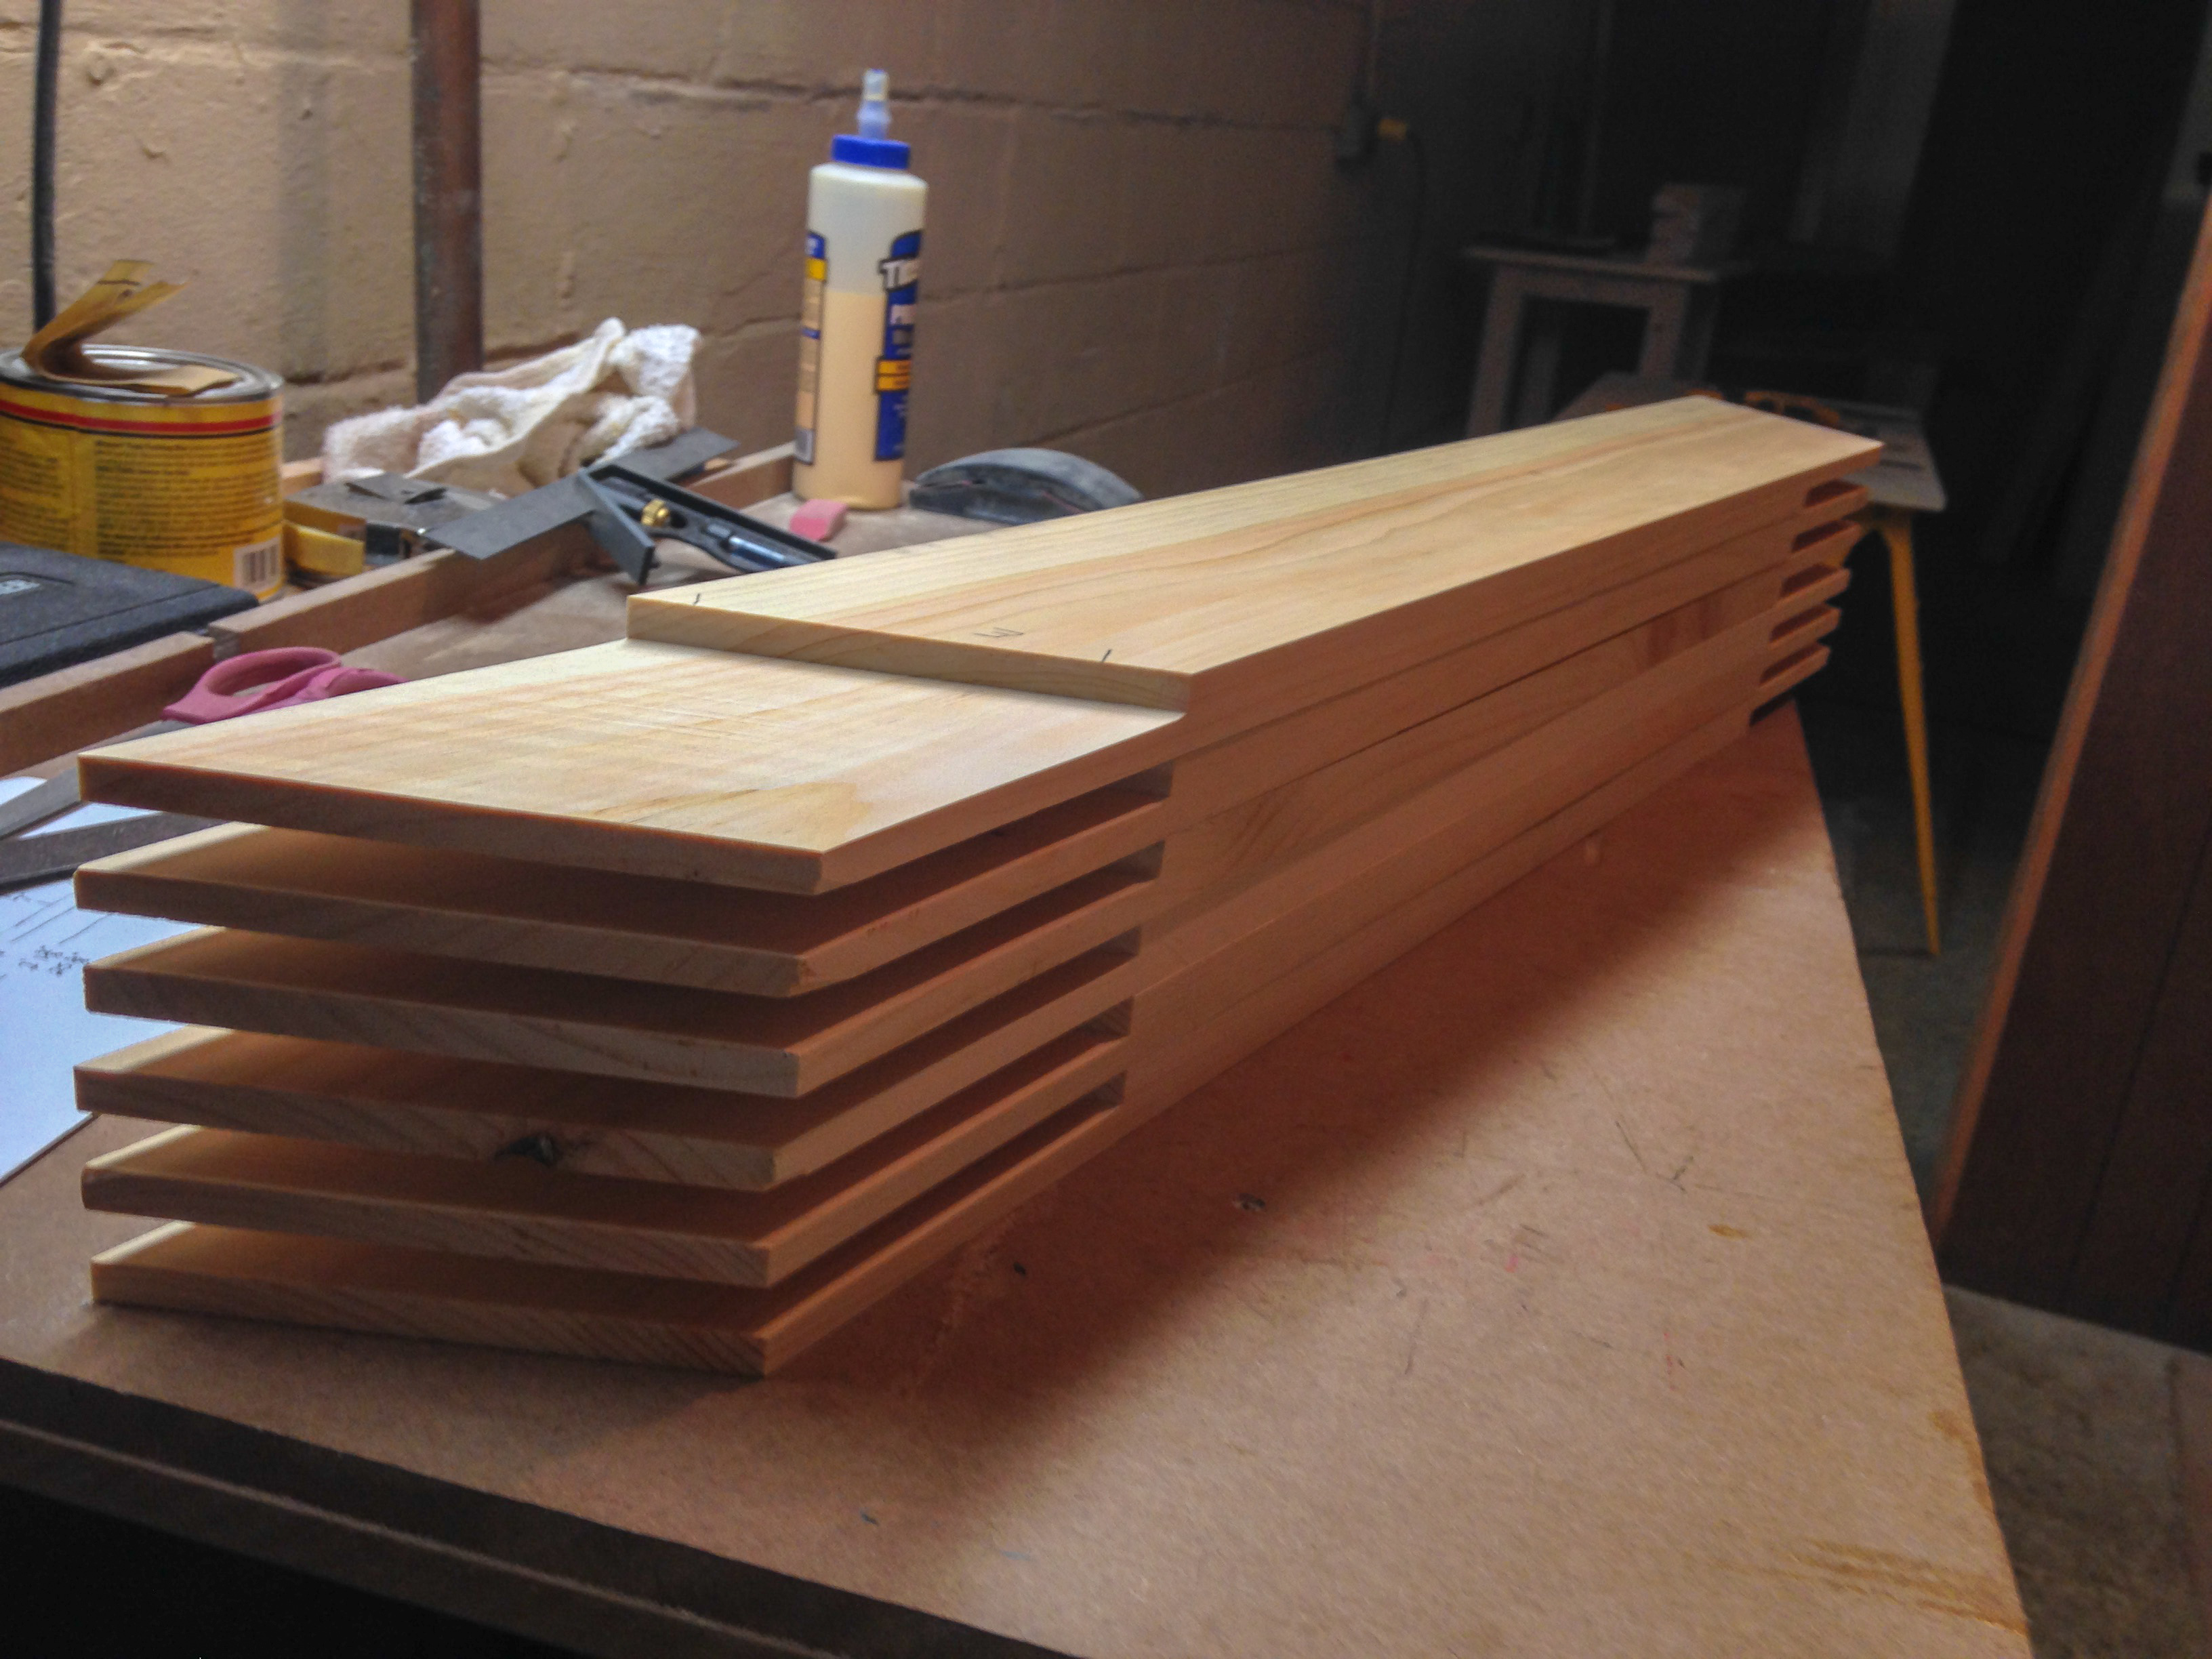
Photo 4
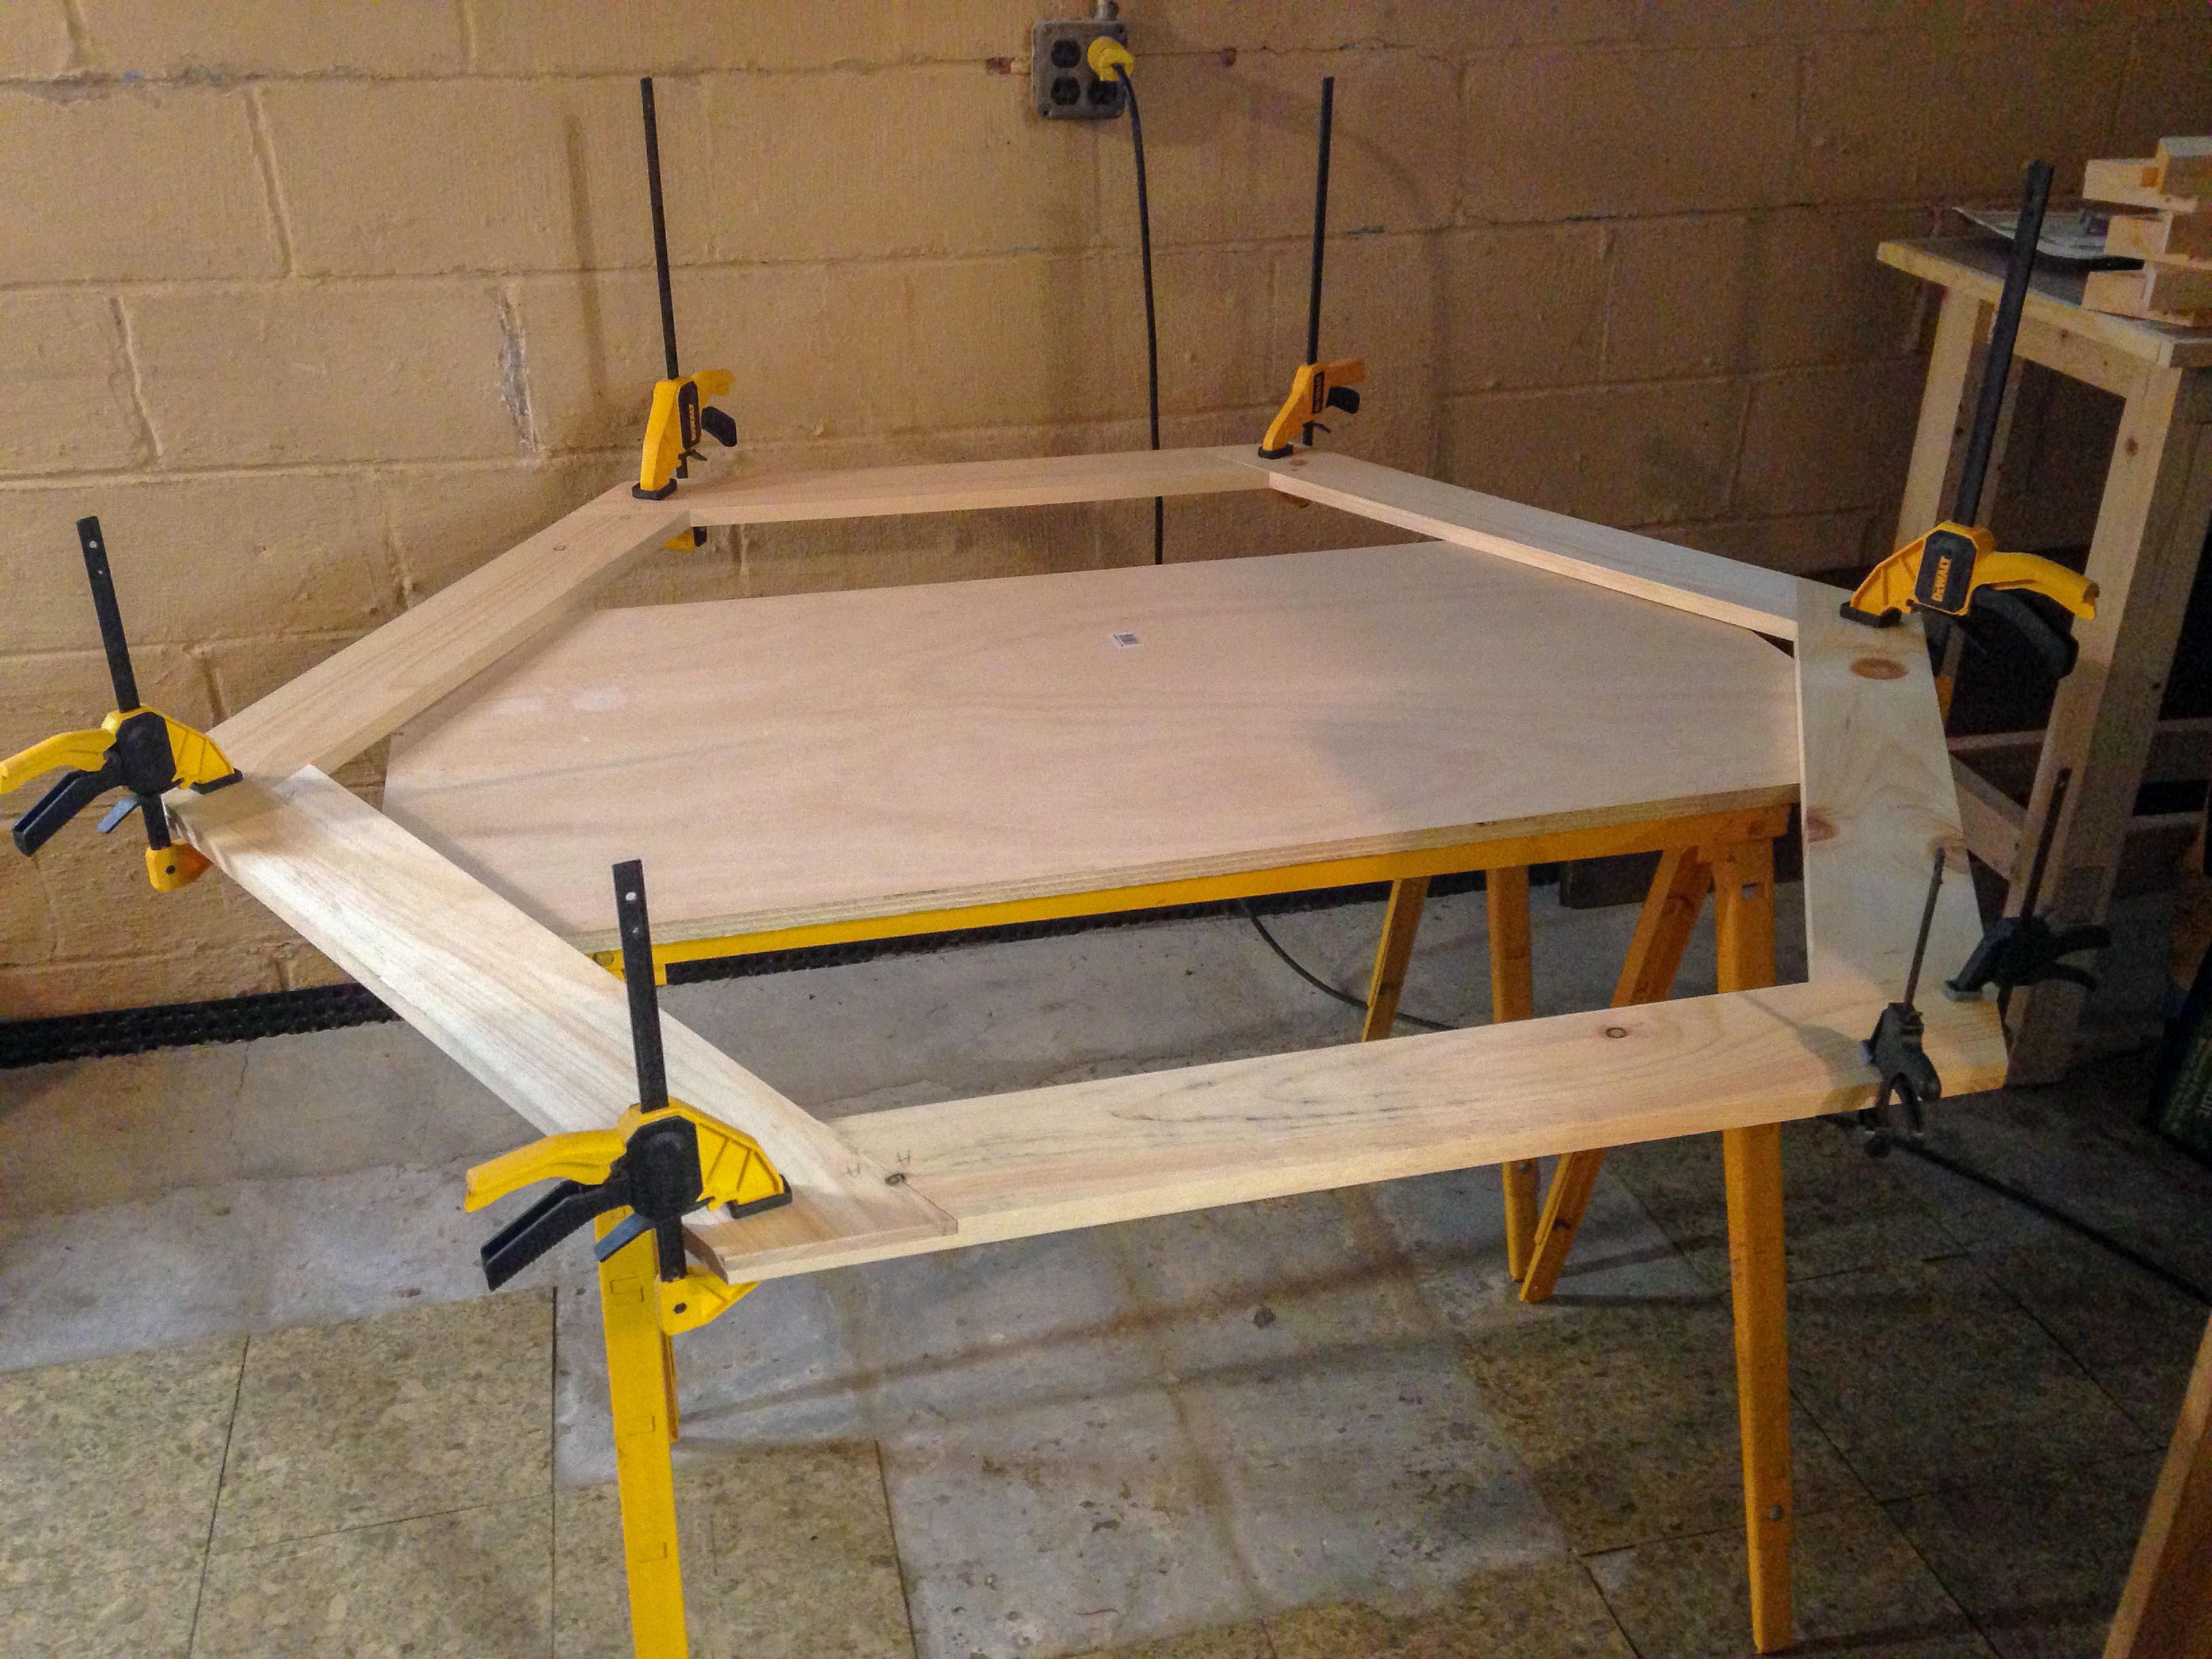
Photo 5
After the outer rails were assembled and dry, I confirmed my measurements, started working on the support pieces, and preparing the inside, center playing area. This mostly consisted of varying layers of plywood at proper widths to strategically support everything. The center playing area is actually something clever that I came up with (I think.) It is a removable and/or interchangeable insert wrapped with the playing surface material. If my dad ever wants a different design or alternate color, all it takes is making an additional insert and swapping them out. The different design option was actually an added benefit. If I’m being honest, my first thought was to have an easy way to clean up any spills or crumbs by just removing the center. Men, poker, peanuts, chips, and beer. Right?
To complement the removable center during clean-up, I should probably mention the addition of extra large cup holder inserts. I already had these on hand so decided to use them. They hold beverages perfectly and are deep enough to not worry about knocking them over. I also did not secure these in place and instead they rest on the lip of the rail. This is another outlet for cleaning up spills and crumbs by removing an insert and exposing a hole to sweep things in to.
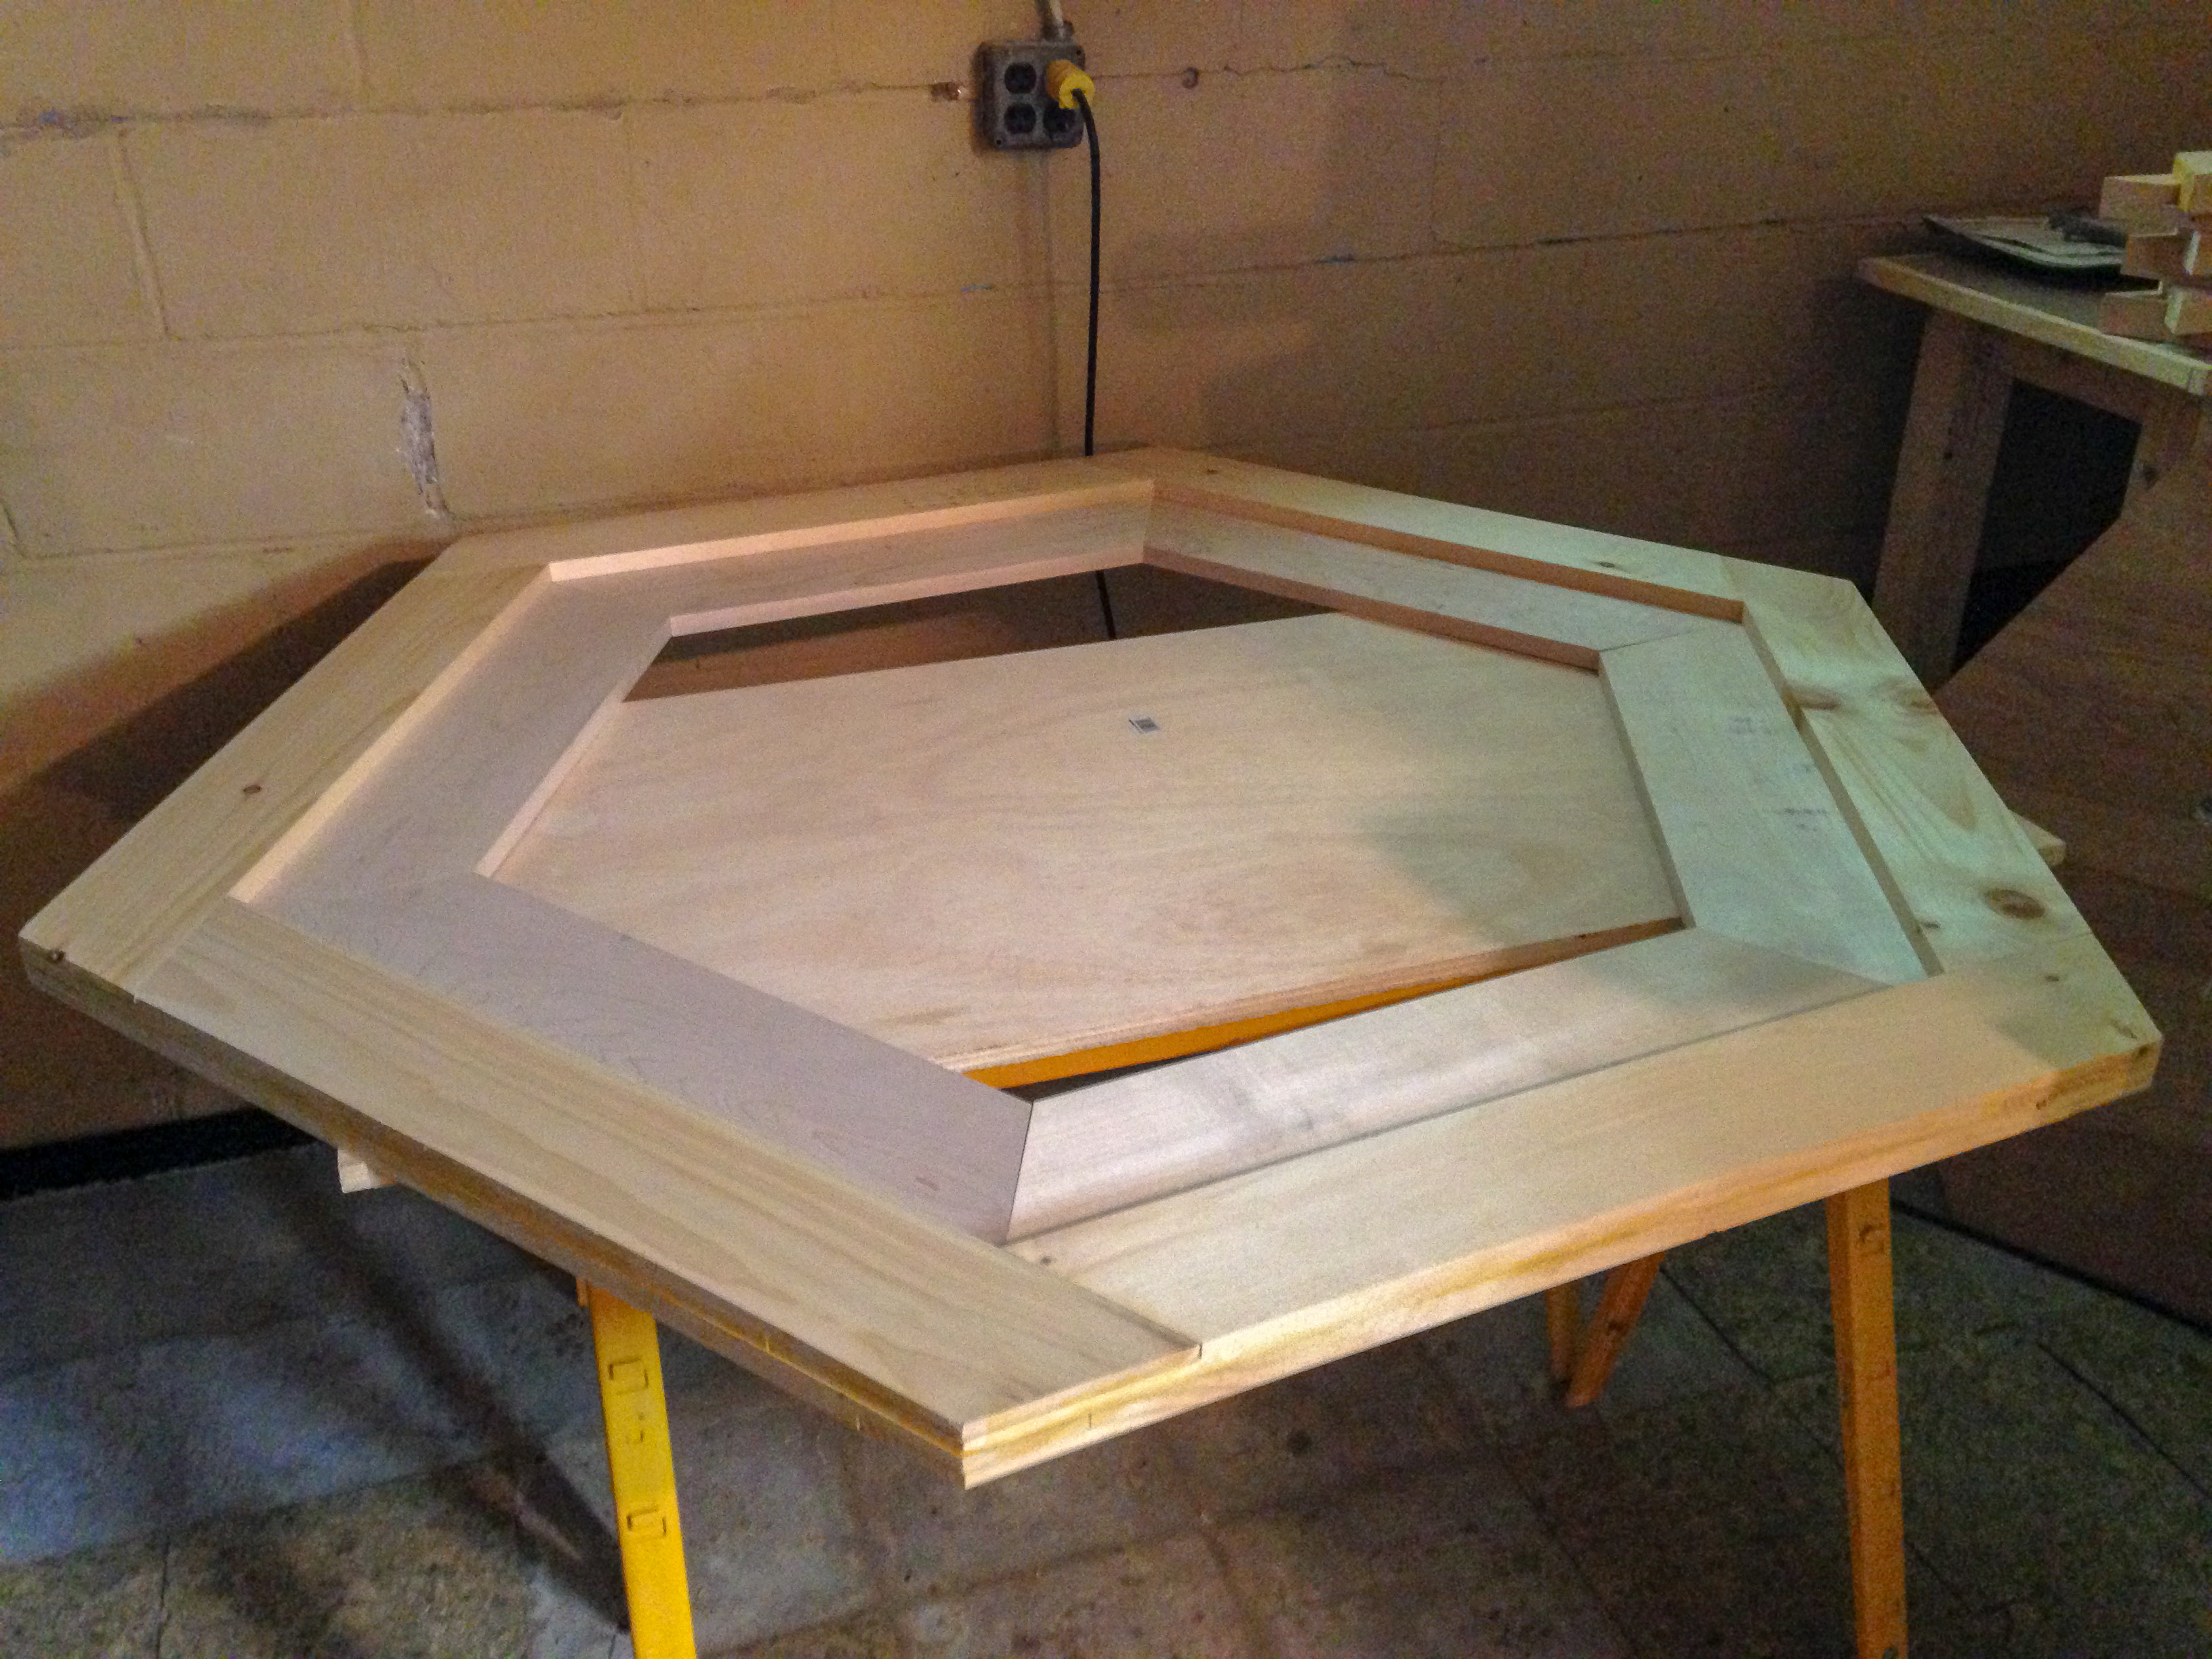
Photo 6
Now for the dreaded armrests. I say dreaded because despite having all of the materials needed and a rough idea on how to apply, I still had no clue what I was doing. Trial and error at its best. Spray adhesive works really well but does not leave much room for error. Step 1: move the armrest ring outside into a very open area. Step 2: align and cut the foam pieces to size for covering the rails. Step 3: spray the rails and the foam pieces with the adhesive and pray you don’t accidentally hit anything else around you because it’s annoying to remove. Step 4: carefully apply the foam and hope it’s in the correct spot. If you miss, enjoy your abstract poker table. Repeat steps for all six sides and make sure to cover the corners as well. Once the foam is applied, it’s time to perform similar steps for the vinyl covering. This was also tricky because you have to line it up, staple/attach one edge to the underside of the rail, and carefully pull the vinyl nice and taught around the foam only to struggle in securing the other edge in a similar, staple fashion. I recommend having a friend help with this process. Overall things worked out, but there could have been a couple of places where I used better care. The only part that annoyed me were the visible corner seams. To remedy this, I cut strips of left over vinyl and made straps to wrap around the corners. It's not the best look, but effective!
The last step was to move the chip rail outside for stain and finish. This part was by far my favorite because the wood was gorgeous, with beautiful grain, and the stain/finish made it look amazing! Once the finish dried, it was time to assemble the entire thing, give it a small test run, and wrap it up for the client. Father’s Day!
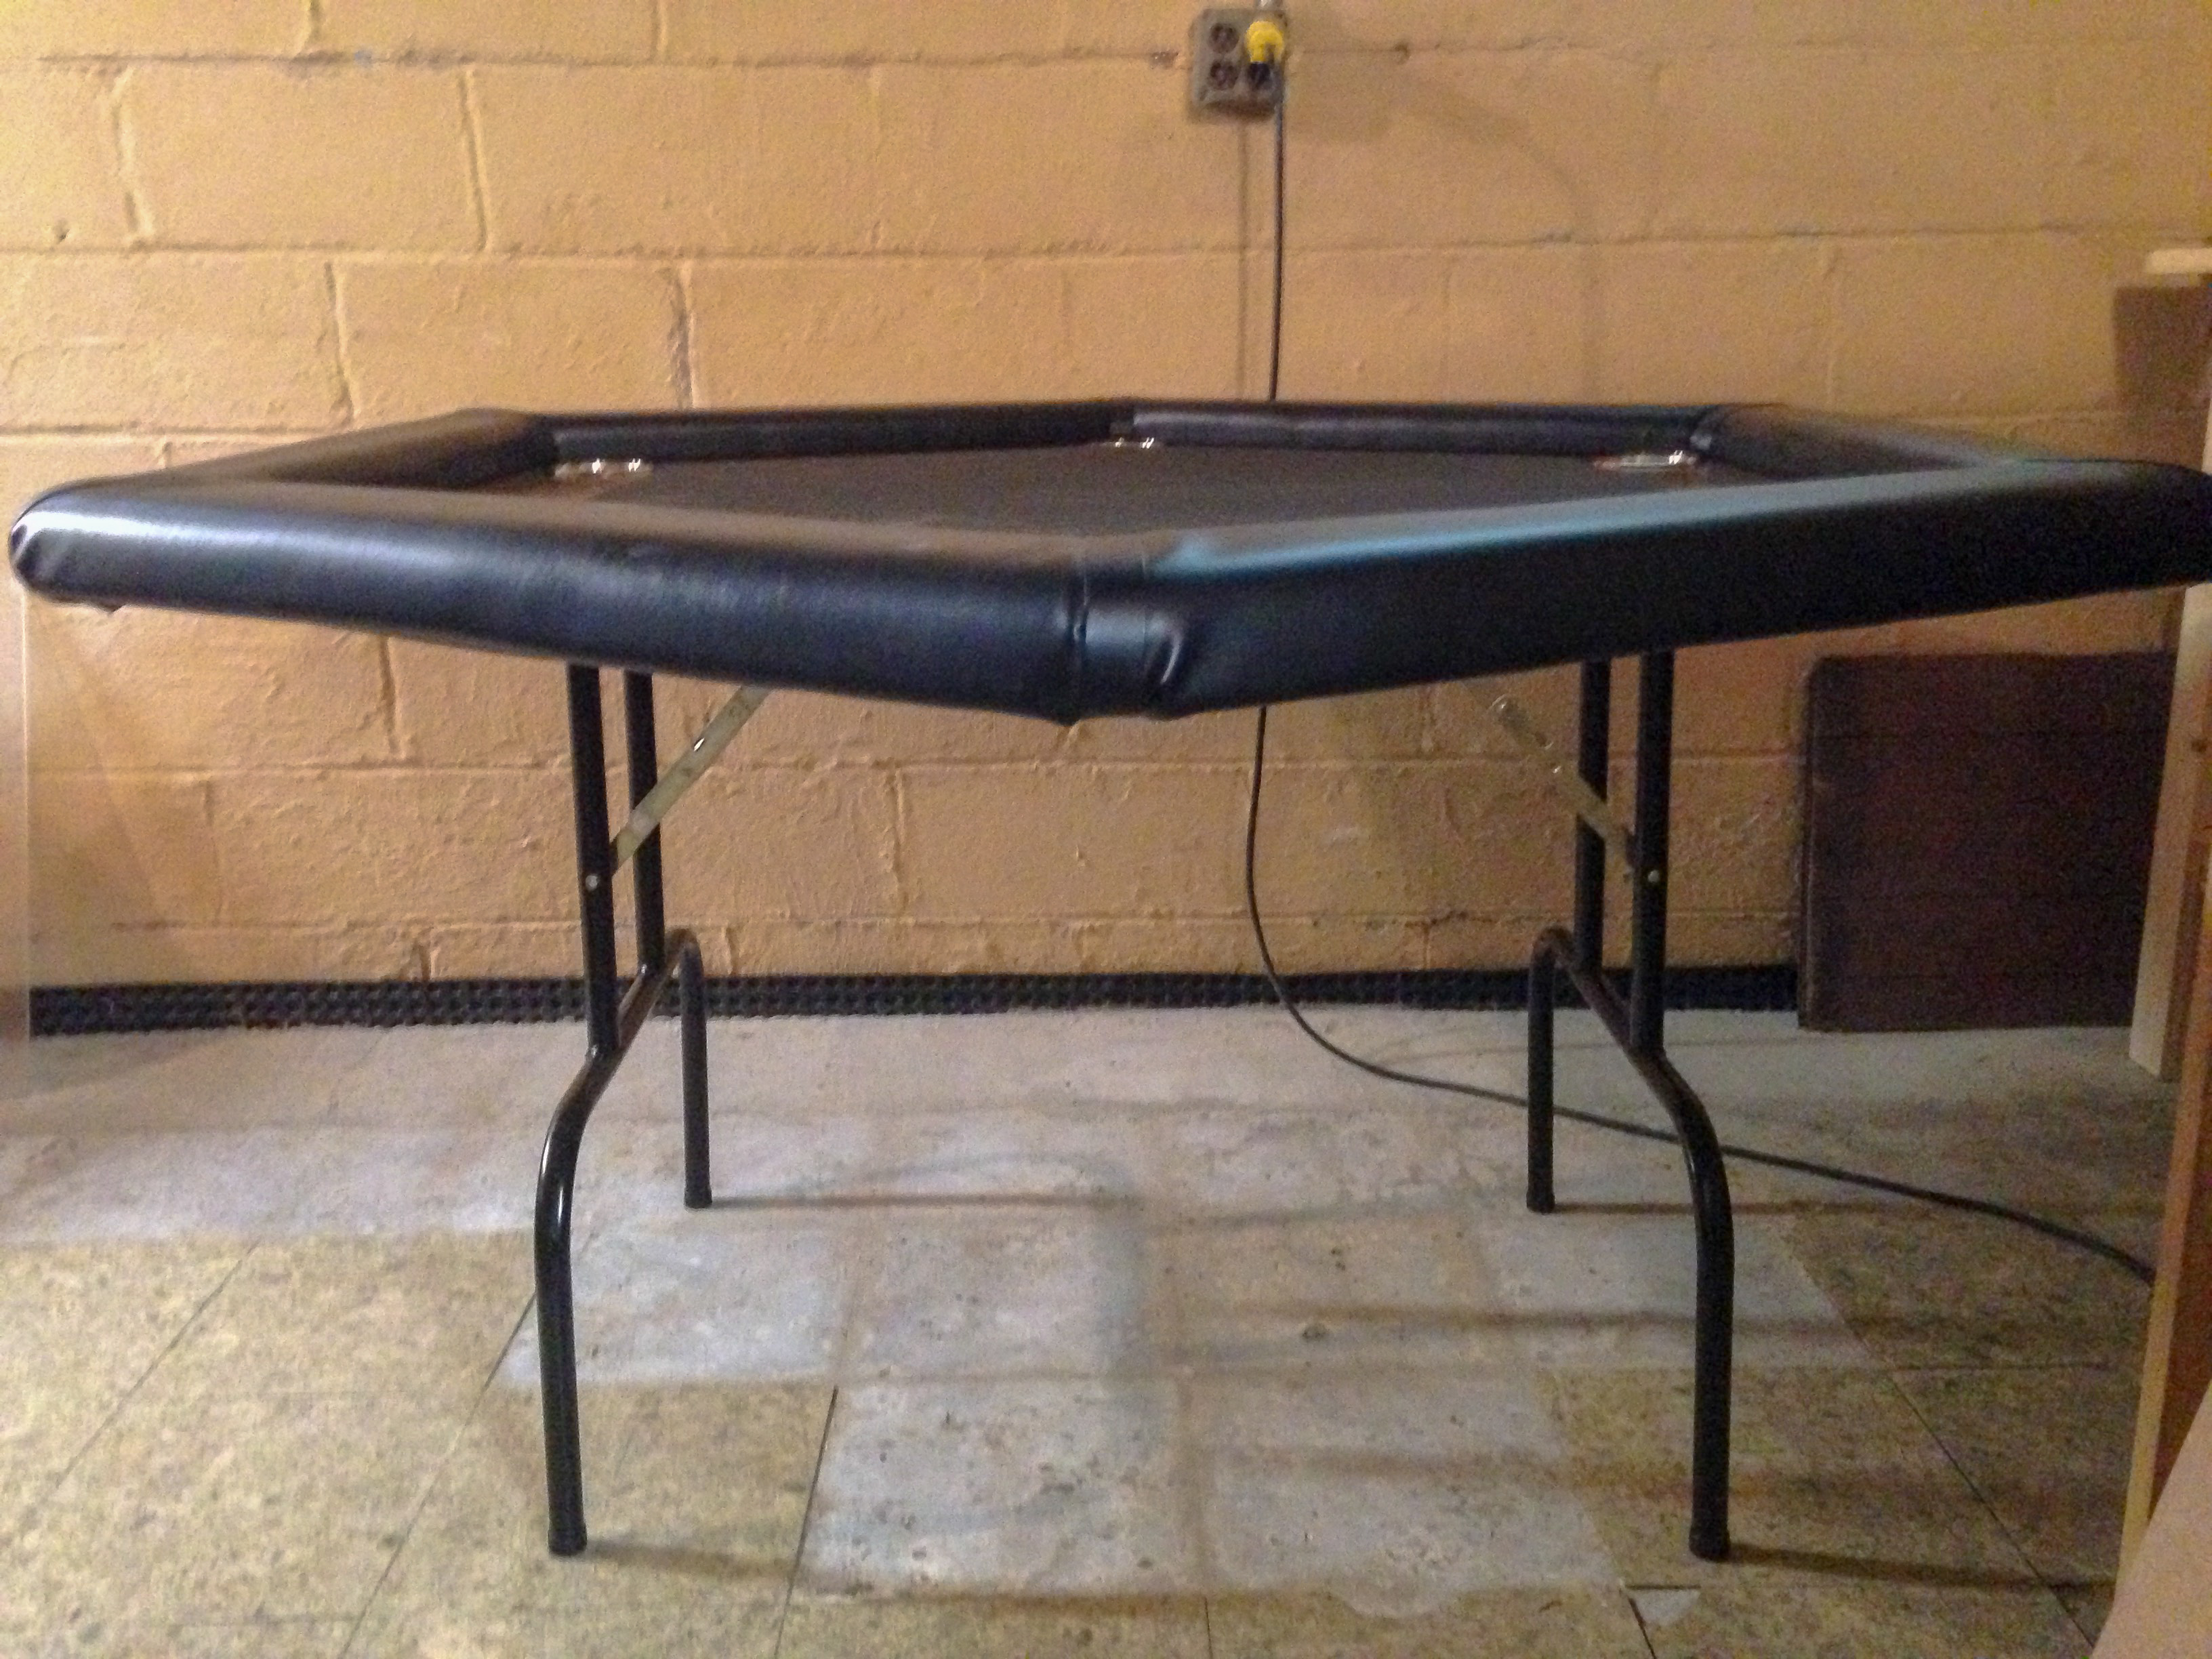
Photo 7
Lessons learned
I wanted to include a small section where I highlight the lessons learned with this build. These lessons will hopefully help me learn from my mistakes and potentially help anyone else from doing the same. I already touched on most of the lessons learned above, so this will be a slight recap.
The first lesson learned: joint planning. Like I mentioned, glue and pocket screws alone were not ideal with these types of angles and stress. Switching to half-lap joints was a much better (yet possibly still not the best) idea. How to prevent this in the future? Better planning during the design phase and thinking ahead!
The second lesson learned: vinyl wrapping is hard. I ended up completing the task, but man was it rough. Some areas were not wrapped tight enough and other areas didn’t hold because I pulled it way too tight. The spray adhesive needed is extremely sticky and needs to be carefully placed. Otherwise, it will get everywhere and be a pain to remove. I will definitely think twice before tackling that process again.
I’m sure I can come up with other lessons learned, but I’ll shorten this read a bit by saying that planning is crucial.
Conclusion
Overall, I am extremely satisfied with this project. I think it came out absolutely perfect. Granted some of the details could have been handled a bit cleaner, but I am still content with the way they are. We decided to give the table to my dad as a combination gift between Father’s Day and his birthday. Those two dates are roughly four months apart but that is how long it took us to finalize everything. Our dad had no idea he was getting a new poker table. We wrapped it in brown craft paper and he obviously knew what it was as soon as it was presented. What else is that large and a hexagon shape? Needless to say, he was beyond thrilled. I mean it’s our dad. We could’ve bought him a folding table at Target and wrote “Poker Table” on it with permanent marker and he’d still be thrilled. He now uses the table twice per year. Every time he does, I receive nothing but compliments on how great it turned out. It's only a matter of time before I have requests from his friends for their own table. Would I build this again? Probably. Although I do not have any requests for a six man poker table, yet. Do you need one? Can you custom order one for yourself? Absolutely!
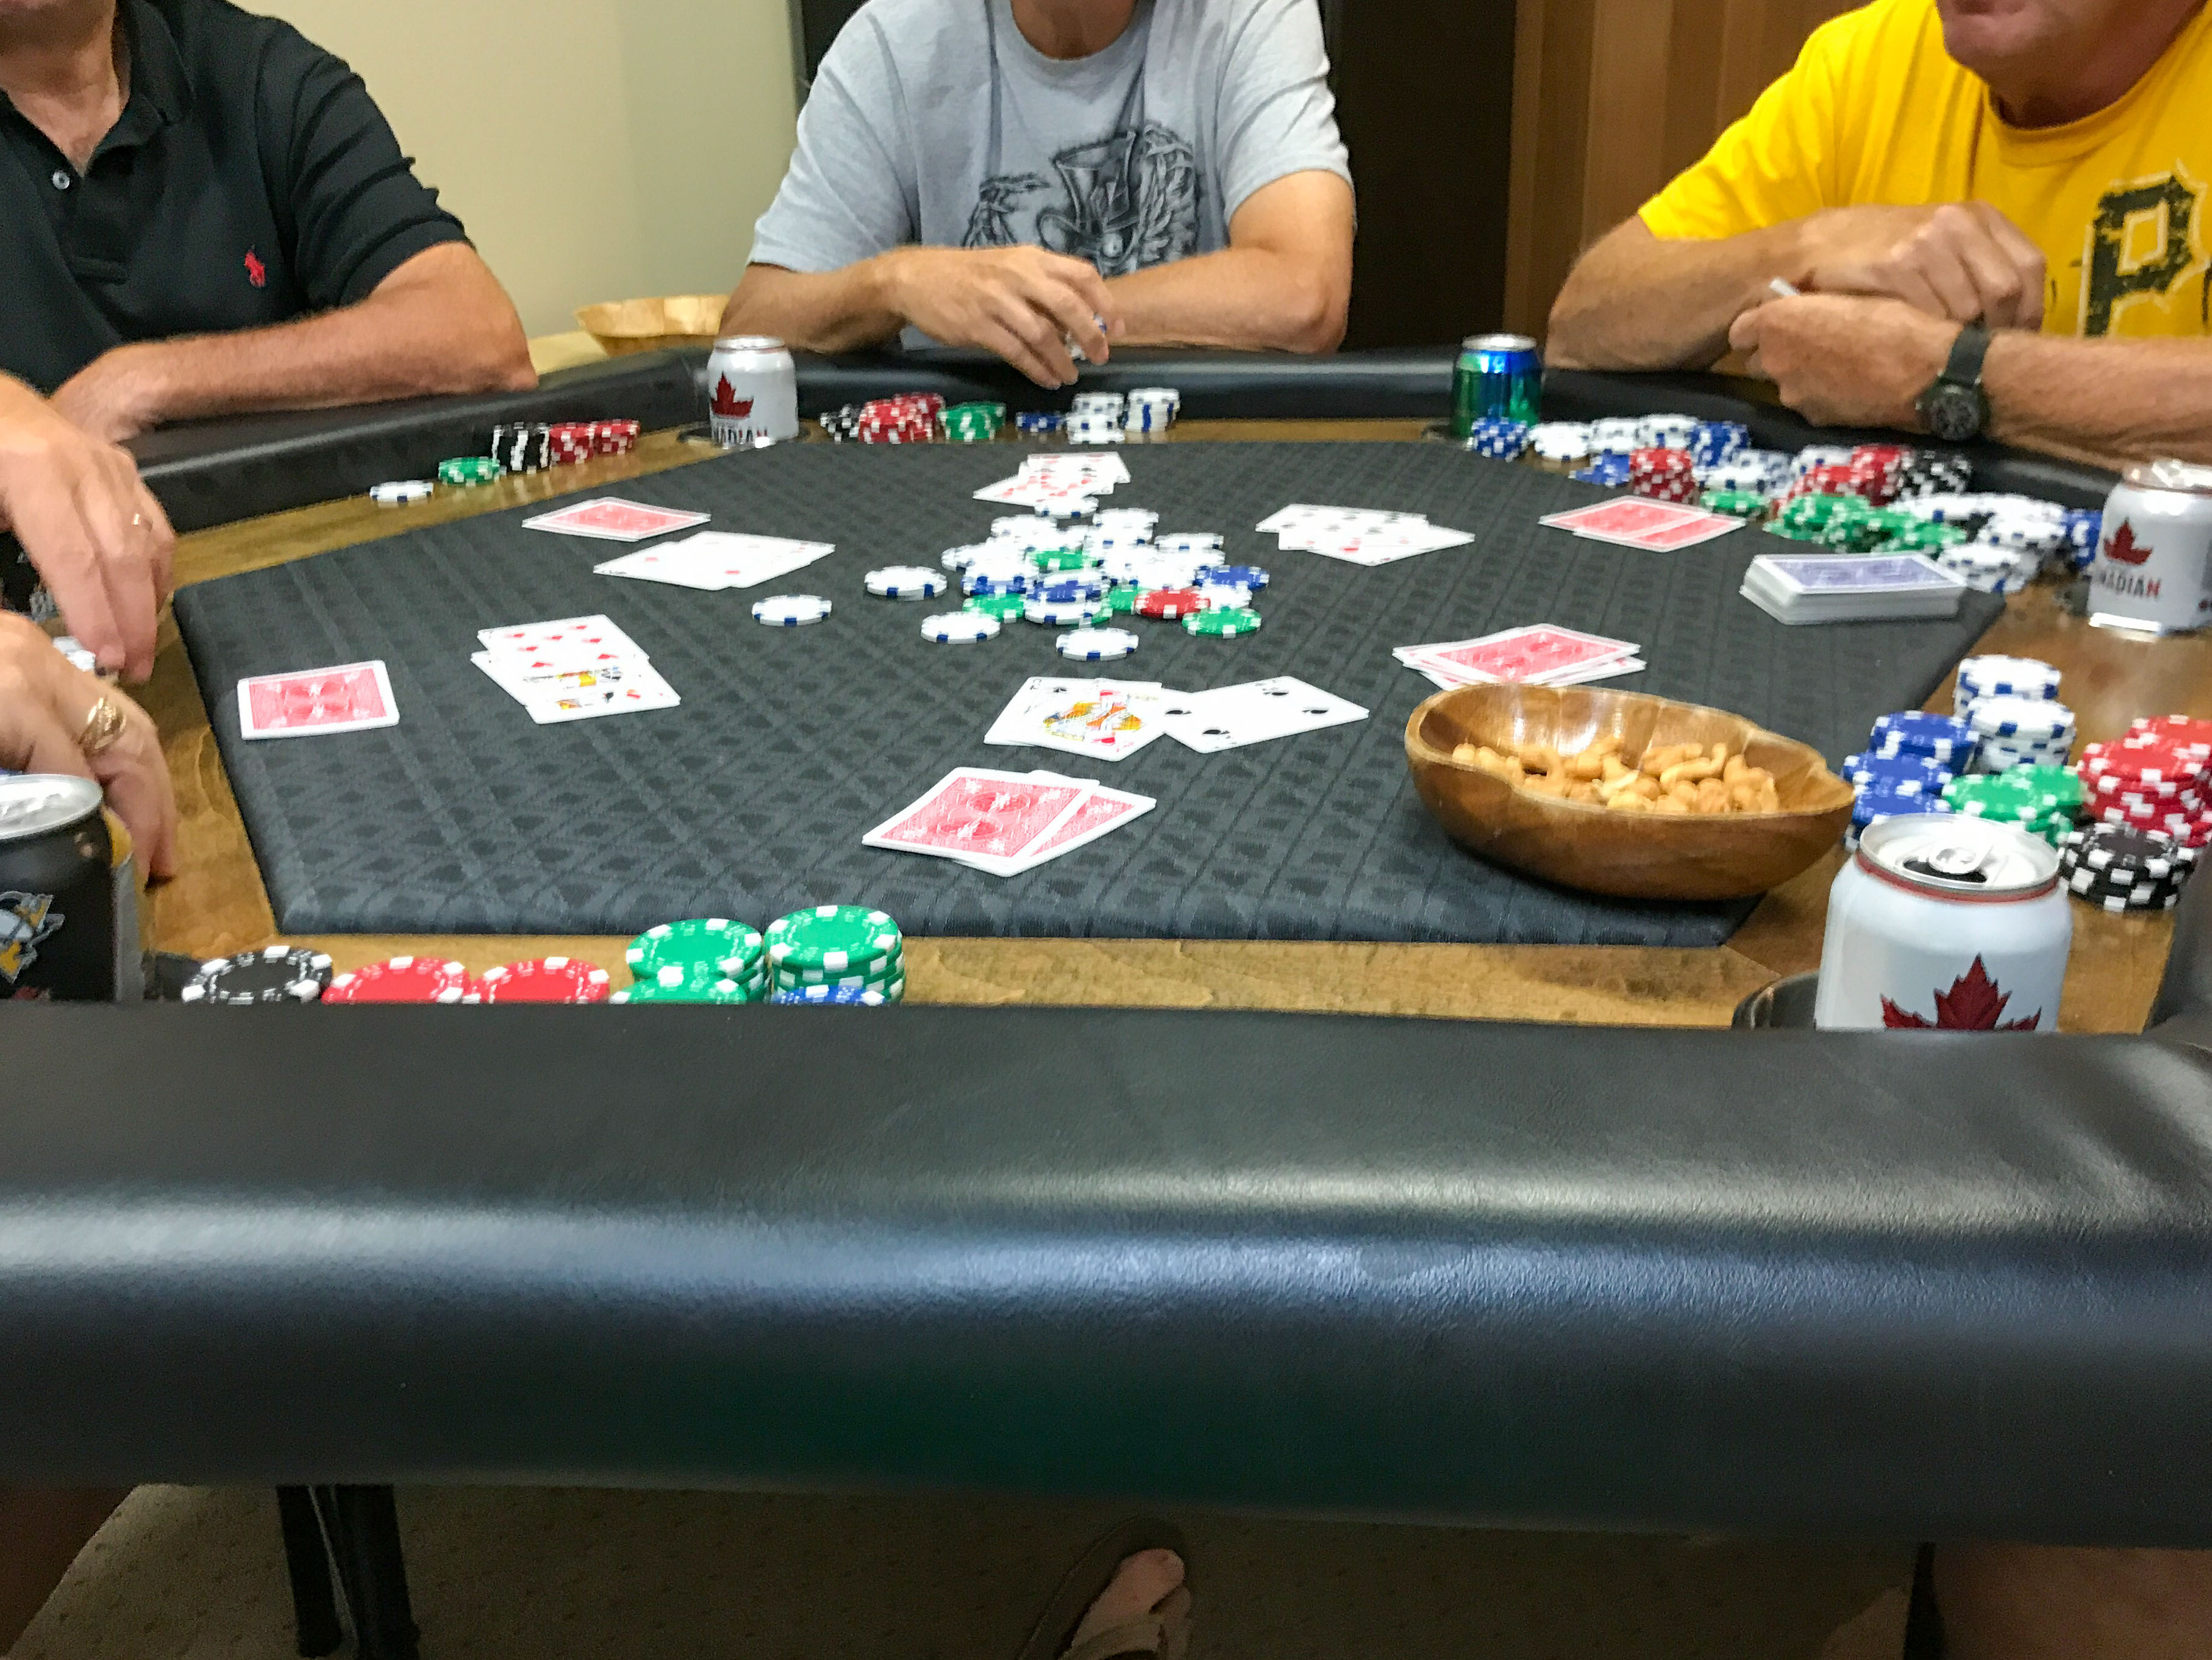
Photo 8


